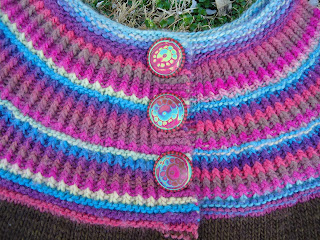
I finally got around to making the buttons for my Shalom Cardigan.
I had an idea in my head of the buttons I wanted to make. So I looked through the colors of polymer clay that I already had mixed from previous projects and picked a few that matched, then mixed a few more to fill in the colors I was missing.
I stacked my colors and then ran them through the pasta machine a few times to make them thinner - stacking and restacking as I went.
Then I impressed several different patterns (rubber stamps, ball stylus and an adding machine paper part) into the stack to move the colors around a bit. This is called mokume gane which is a Japanese metal working term.
I sliced through the stack to reveal wonderful patterns. I love this part!
I cut thin slices from this stack to cover the button bases that I prepared.
I finished by adding a striped edging and then baked. Finally I sanded and buffed the buttons and added a button shank. I love how they turned out.
If you are interested in making your own buttons from polymer clay, Lisa Clark from Polka Dot Cottage has a wonderful tutorial for beginner button makers. Check it out.
While I was at it, I made buttons for my Carnaby Skirt that I finished recently.
I had a cane that I had made a few years back that matched perfectly with the yarn for my skirt so I made some simple buttons and I think they turned out well.
And we will end with a picture I took of myself before I handed my camera to my daughter who took a much better picture.


What a photo! Thanks for sharing your creative process and link. It would be really nice to make my own buttons...
ReplyDelete